Cathedral Window Place Mat
Its the sixth and final color from the Simply Color books by Vanessa Christenson from Lucky Spool, Purple. So we picked a project unlike any other to do, a cathedral window place mat.
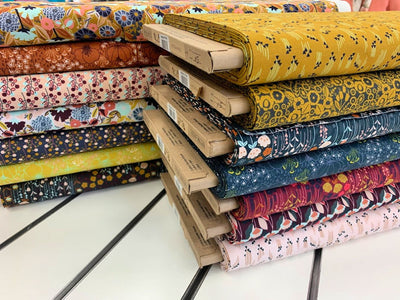
And like every color of the month, all merchandise with purple is 15% off in the store for the month of June.
For this project you'll need 13 or more purple fabric scraps, grey fabric for background, and a binding fabric. A marking tool and glue pen will also help in this project. (Measurements for this project are not given--if you wish to make this project, you can find the rest of the information in the Simply Color: Purple book.) General steps for the traditional Cathedral Windows quilt block are illustrated here:
To start, you will need to mark each large grey square 1/4" in around the right side of the fabric. Don't worry, the markings will not show in the end. Fold the edges along the line, so the wrong side of fabric has a folded frame of sorts, and press with an iron.
Fold the square in half and press for a vertical line, then unfold and fold again for a horizontal line and press. Your squares should look like a four-square court.
Now fold all the corners into the center of the square and press. Make sure you have crisp corners, it will help later on! If the corner points do not want to stay, use a glue pen to tack them down so they do not move for the next step.
Flip the square over and once more fold the new square corners into the center to get something like this.
Now that all 12 squares have been folded down, assemble them in three rows of four. This is were it gets a little tricky – pin the flaps of the squares together, touching each other. For example: pin square 1's right flap to square 2's left flap, pin square 2's right flap to square 3's left flap, and so on for the rest. You will then, carefully, stitch the rows together just overlapping onto the square to the right to make a connection. Repeat the steps for the horizontal flaps and stitch just a little onto the square to the right.
Your mat of squares at this point should be totally connected. Fold all the triangle flaps back into the center of the squares, and with a back stitch, sew a small X at each junction of four folded corners. This will hold the folds down.
Place and pin the smaller purple squares in the open square areas around the mat.
To get the cathedral window look, finger press the curves into place and pin with a fine straight pin. Sew as close to the edge as you feel comfortable for each square.
We left a few of the squares blank to give it a broken up look.
When all the windows have been sewn, this is what our mat looked like.
You do not have to put a backing on this mat if you do not want to. Sew on the binding of your choice, and you are done!
For a complete and more detail look at this project pick up a copy of the Simply Color PURPLE book. There are a ton of other fun projects based around the color purple, so be sure to take a look. And don't forget, for the month of June, it'll be 15% off!
Happy sewing!